题目稍有些标题党,最近公司想用 chaos-meshk8s 做混沌测试,开始做前期的调研,发现 pingcap 对时间的注入非常硬核,而且最终方案居然是实习生构思出来的 ^^

TL;DR: 通过劫持 vdso, 将时间函数跳转到 hack 过的汇编指令来实现 time skew. 原理不难懂,但细节超多,参考官方文档

为什么需要 time skew

可以参考 Chaos Mesh - 让时间在容器中自由摇摆, 简单来说就是:

分布式数据库要实现全局一致性快照,很多方案使用时间做逻辑时钟,所以需要解决不同节点之间时钟一致的问题。但往往物理节点上的物理时间总是会出现偏差,不管是使用 NPT 服务同步也好,或者其他方法总是没办法完全避免出现误差,这时候如果我们的应用不能够很好的处理这样的情况的话,就可能造成无法预知的错误。

其实这很符合工程设计哲学:design for failure, 任何一个硬件或是软件都会有错误(fault),系统如何在不影响对外提供服务的前提下,如何处理这些故障,就是我们常说的 fault tolerance

但是对于非金融业务来说,时间偏移一点影响并不大,相比其它 chaos, time的场景还是受限一些

如何注入

从实体机的经验来看,所谓的混沌测试都比较直观的,比如用 tc 做网络的丢包,限速来模拟网络故障,使用 stress 模拟 cpu 压力。但是在容器中做如何模拟 time skew 呢?

如果直接使用 linux date 命令修改,会影响到宿主机上其它所有容器。有没有方法能只影响某个容器?
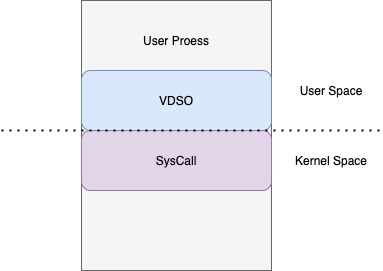
之前发过一篇文章 时钟源为什么会影响性能, 从中可以看到,go 调用系统时间函数时,会先调用 vdso 的代码,如果时钟源符合条件,直接在用户空间完成,并不会进入内核空间,所以针对这一现象,syscall 劫持的方法就不能使用了

那么是否可以直接修改 vdso 段代码呢?

查看 vdso

1
2
3
4
5
6
# cat /proc/1970/maps
......
7ffe8478a000-7ffe847ab000 rw-p 00000000 00:00 0 [stack]
7ffe847bb000-7ffe847be000 r--p 00000000 00:00 0 [vvar]
7ffe847be000-7ffe847bf000 r-xp 00000000 00:00 0 [vdso]
ffffffffff600000-ffffffffff601000 --xp 00000000 00:00 0 [vsyscall]

可以看到 vdso 代码段的起始逻辑地址,同时注意权限位是 r-xp, 这就意味着用户态的进程是无法直接修改该内容。

真的就没办法了嘛?有的,ptrace 法力无边

The ptrace() system call provides a means by which one process
(the “tracer”) may observe and control the execution of another
process (the “tracee”), and examine and change the tracee’s
memory and registers. It is primarily used to implement
breakpoint debugging and system call tracing.

ptrace 提供了一种修改和观察其它进程的手段,包括修改内存值和寄存器,巧了这些 chaos-mesh 都用到了。如何实现 go 调试器 这篇文章也讲了 ptrace 的用途,很棒的文章。

整体实现

chaos-flow.png

这就是简单的流程图,主要代码都是 time_linux_amd64.go, 当前仅支持 linux amd64 平台,不支持 Windows/MacOS

1
2
3
4
5
6
7
8
9
10
11
12
13
14
15
16
17
18
19
20
21
22
23
24
25
26
27
28
29
30
31
32
33
34
35
36
37
38
39
40
41
42
43
44
45
46
47
48
49
50
51
52
53
54
55
56
57
58
59
60
61
62
63
64
65
66
67
68
69
70
71
72
73
74
75
76
77
78
79
80
81
82
83
84
85
86
// ModifyTime modifies time of target process
func ModifyTime(pid int, deltaSec int64, deltaNsec int64, clockIdsMask uint64) error {
......
runtime.LockOSThread() // 将当前 goroutine 绑定底层线程
defer func() {
runtime.UnlockOSThread()
}()

program, err := ptrace.Trace(pid) // ptrace 获得 program
if err != nil {
return err
}
defer func() {
err = program.Detach()
if err != nil {
log.Error(err, "fail to detach program", "pid", program.Pid())
}
}()

var vdsoEntry *mapreader.Entry // 遍历 entry 找到 vdso
for index := range program.Entries {
// reverse loop is faster
e := program.Entries[len(program.Entries)-index-1]
if e.Path == "[vdso]" {
vdsoEntry = &e
break
}
}
if vdsoEntry == nil {
return errors.New("cannot find [vdso] entry")
}

// minus tailing variable part
// 24 = 3 * 8 because we have three variables
constImageLen := len(fakeImage) - 24
var fakeEntry *mapreader.Entry

// find injected image to avoid redundant inject (which will lead to memory leak)
for _, e := range program.Entries {
e := e

image, err := program.ReadSlice(e.StartAddress, uint64(constImageLen))
if err != nil {
continue
}

if bytes.Equal(*image, fakeImage[0:constImageLen]) {
fakeEntry = &e // 遍历找到 fake Image Entry,不能重复生成
log.Info("found injected image", "addr", fakeEntry.StartAddress)
break
}
}
if fakeEntry == nil { // 如果 fakeEntry 不存在,用 Mmap 分配内存,内容是 fakeImage 汇编指令
fakeEntry, err = program.MmapSlice(fakeImage)
if err != nil {
return err
}
}
fakeAddr := fakeEntry.StartAddress

// 139 is the index of CLOCK_IDS_MASK in fakeImage 写 clockidsmask
err = program.WriteUint64ToAddr(fakeAddr+139, clockIdsMask)
if err != nil {
return err
}

// 147 is the index of TV_SEC_DELTA in fakeImage 写偏移量秒
err = program.WriteUint64ToAddr(fakeAddr+147, uint64(deltaSec))
if err != nil {
return err
}

// 155 is the index of TV_NSEC_DELTA in fakeImage 写偏移量纳秒
err = program.WriteUint64ToAddr(fakeAddr+155, uint64(deltaNsec))
if err != nil {
return err
}
// 找到 clock_gettime 在 vdso 中的位置
originAddr, err := program.FindSymbolInEntry("clock_gettime", vdsoEntry)
if err != nil {
return err
}
// originAddr 位置 hijack, 写上 jump 指令,跳转到 fakeImage
err = program.JumpToFakeFunc(originAddr, fakeAddr)
return err
}

代码写上了注释,分别对应上面的流程图。下面分解来看。

1. Ptrace

1
2
3
4
5
6
7
8
type TracedProgram struct {
pid int
tids []int
Entries []mapreader.Entry

backupRegs *syscall.PtraceRegs
backupCode []byte
}

TracedProgram 结构体比较简单,pid 是待注入 chaos 的进程 id, 同时 tids 保存所有的线程 id, Entries 是进程逻辑地址空间,

Trace 函数在代码 ptrace_linux_amd64.go

通过读取 /proc/{pid}/task 获取进程的所有线程,然后分别对所有线程执行 linux ptrace 调用。然后生成 Entries, 什么是 Entry 呢?就是上文提到的 /proc/{pid}/maps 内容

1
2
3
4
5
......
7ffe8478a000-7ffe847ab000 rw-p 00000000 00:00 0 [stack]
7ffe847bb000-7ffe847be000 r--p 00000000 00:00 0 [vvar]
7ffe847be000-7ffe847bf000 r-xp 00000000 00:00 0 [vdso]
ffffffffff600000-ffffffffff601000 --xp 00000000 00:00 0 [vsyscall]

2. Mmap FakeImage

查找 vdso, 如何失败,直接退出。一般 vdso 都在最后,所以从尾开始遍历

同时还要查找 fakeEntry, 如果存在,直接复用。否则会造成内存泄漏,当然了,一直创建新的 fakeEntry …..

program.MmapSlice 用于创建 fakeEntry, Mmap 分配内存,然后将 fakeImage (新的汇编代码) 写到这块内存中。

1
2
3
4
5
6
7
8
9
10
11
12
13
14
15
16
17
18
19
20
21
22
// MmapSlice mmaps a slice and return it's addr
func (p *TracedProgram) MmapSlice(slice []byte) (*mapreader.Entry, error) {
size := uint64(len(slice))

addr, err := p.Mmap(size, 0)
if err != nil {
return nil, errors.WithStack(err)
}

err = p.WriteSlice(addr, slice)
if err != nil {
return nil, errors.WithStack(err)
}

return &mapreader.Entry{
StartAddress: addr,
EndAddress: addr + size,
Privilege: "rwxp",
PaddingSize: 0,
Path: "",
}, nil
}

注意,这不是简单的调用 Mmap Syscall !!! ptrace.Syscall 是利用 ptrace 控制进程,让目标进程单步执行 syscall

1
2
3
4
5
6
7
8
9
10
11
12
13
14
15
16
17
18
19
20
21
22
23
24
25
26
27
28
29
30
31
32
33
34
35
36
37
38
39
40
41
42
43
44
45
46
47
48
49
50
51
52
53
54
55
56
57
58
// Syscall runs a syscall at main thread of process
func (p *TracedProgram) Syscall(number uint64, args ...uint64) (uint64, error) {
err := p.Protect() // 保存目标进程的寄存器
if err != nil {
return 0, err
}

var regs syscall.PtraceRegs

err = syscall.PtraceGetRegs(p.pid, &regs)
if err != nil {
return 0, err
}
regs.Rax = number // 设置操作 syscall number, 填充其它参数
for index, arg := range args {
// All these registers are hard coded for x86 platform
if index == 0 {
regs.Rdi = arg
} else if index == 1 {
regs.Rsi = arg
} else if index == 2 {
regs.Rdx = arg
} else if index == 3 {
regs.R10 = arg
} else if index == 4 {
regs.R8 = arg
} else if index == 5 {
regs.R9 = arg
} else {
return 0, fmt.Errorf("too many arguments for a syscall")
}
}
err = syscall.PtraceSetRegs(p.pid, &regs)
if err != nil {
return 0, err
}

ip := make([]byte, ptrSize)

// We only support x86-64 platform now, so using hard coded `LittleEndian` here is ok. 设置 rip 寄存器
binary.LittleEndian.PutUint16(ip, 0x050f)
_, err = syscall.PtracePokeData(p.pid, uintptr(p.backupRegs.Rip), ip)
if err != nil {
return 0, err
}

err = p.Step() // 单步执行
if err != nil {
return 0, err
}

err = syscall.PtraceGetRegs(p.pid, &regs)
if err != nil {
return 0, err
}

return regs.Rax, p.Restore() // 获取返回值,并且恢复寄存器
}

参考代码的注释,搞过嵌入式的肯定熟悉:保存寄存器现场,设置新的寄存器值为 syscall number 以及参数,最后设置指令寄存器 rip 单步执行,就完成了让目标进程执行 mmap 的操作,最后也要恢复寄存器,还原现场。

这里为什么 rip 寄存器要设置成 0x050f 呢???其实这是 syscall 的操作码

另外 p.WriteSlice 是使用 syscall process_vm_writev 将数据写入目标进程的内存逻辑地址空间。

3. FindSymbolInEntry

1
2
3
4
5
6
7
8
9
10
11
12
13
14
15
16
17
18
~# file /tmp/vdso.so
/tmp/vdso.so: ELF 64-bit LSB shared object, x86-64, version 1 (SYSV), dynamically linked, BuildID[sha1]=17d65245b85cd032de7ab130d053551fb0bd284a, stripped
~# objdump -T /tmp/vdso.so

/tmp/vdso.so: file format elf64-x86-64

DYNAMIC SYMBOL TABLE:
0000000000000950 w DF .text 00000000000000a1 LINUX_2.6 clock_gettime
00000000000008a0 g DF .text 0000000000000083 LINUX_2.6 __vdso_gettimeofday
0000000000000a00 w DF .text 000000000000000a LINUX_2.6 clock_getres
0000000000000a00 g DF .text 000000000000000a LINUX_2.6 __vdso_clock_getres
00000000000008a0 w DF .text 0000000000000083 LINUX_2.6 gettimeofday
0000000000000930 g DF .text 0000000000000015 LINUX_2.6 __vdso_time
0000000000000930 w DF .text 0000000000000015 LINUX_2.6 time
0000000000000950 g DF .text 00000000000000a1 LINUX_2.6 __vdso_clock_gettime
0000000000000000 g DO *ABS* 0000000000000000 LINUX_2.6 LINUX_2.6
0000000000000a10 g DF .text 000000000000002a LINUX_2.6 __vdso_getcpu
0000000000000a10 w DF .text 000000000000002a LINUX_2.6 getcpu

FindSymbolInEntry 函数很简单,就是要找到 clock_gettime 在 vdso 中的地址,参考我之前的文章,上面是 dump 出来的符号表

4. JumpToFakeFunc

1
2
3
4
5
6
7
8
9
10
11
12
13
14
// JumpToFakeFunc writes jmp instruction to jump to fake function
func (p *TracedProgram) JumpToFakeFunc(originAddr uint64, targetAddr uint64) error {
instructions := make([]byte, 16)

// mov rax, targetAddr;
// jmp rax ;
instructions[0] = 0x48
instructions[1] = 0xb8
binary.LittleEndian.PutUint64(instructions[2:10], targetAddr)
instructions[10] = 0xff
instructions[11] = 0xe0

return p.PtraceWriteSlice(originAddr, instructions)
}

JumpToFakeFunc, 修改 vdso 符号表中的汇编代码,使所有调用 clock_gettime 的都跳转到我们 fakeEntry 的地址,劫持 vdso

FakeImage

1
2
3
4
5
6
7
8
9
10
11
12
13
14
15
16
17
18
19
20
21
22
23
24
25
26
27
28
29
30
31
32
33
34
35
36
37
38
39
40
41
42
var fakeImage = []byte{
0xb8, 0xe4, 0x00, 0x00, 0x00, //mov $0xe4,%eax
0x0f, 0x05, //syscall
0xba, 0x01, 0x00, 0x00, 0x00, //mov $0x1,%edx
0x89, 0xf9, //mov %edi,%ecx
0xd3, 0xe2, //shl %cl,%edx
0x48, 0x8d, 0x0d, 0x74, 0x00, 0x00, 0x00, //lea 0x74(%rip),%rcx # <CLOCK_IDS_MASK>
0x48, 0x63, 0xd2, //movslq %edx,%rdx
0x48, 0x85, 0x11, //test %rdx,(%rcx)
0x74, 0x6b, //je 108a <clock_gettime+0x8a>
0x48, 0x8d, 0x15, 0x6d, 0x00, 0x00, 0x00, //lea 0x6d(%rip),%rdx # <TV_SEC_DELTA>
0x4c, 0x8b, 0x46, 0x08, //mov 0x8(%rsi),%r8
0x48, 0x8b, 0x0a, //mov (%rdx),%rcx
0x48, 0x8d, 0x15, 0x67, 0x00, 0x00, 0x00, //lea 0x67(%rip),%rdx # <TV_NSEC_DELTA>
0x48, 0x8b, 0x3a, //mov (%rdx),%rdi
0x4a, 0x8d, 0x14, 0x07, //lea (%rdi,%r8,1),%rdx
0x48, 0x81, 0xfa, 0x00, 0xca, 0x9a, 0x3b, //cmp $0x3b9aca00,%rdx
0x7e, 0x1c, //jle <clock_gettime+0x60>
0x0f, 0x1f, 0x40, 0x00, //nopl 0x0(%rax)
0x48, 0x81, 0xef, 0x00, 0xca, 0x9a, 0x3b, //sub $0x3b9aca00,%rdi
0x48, 0x83, 0xc1, 0x01, //add $0x1,%rcx
0x49, 0x8d, 0x14, 0x38, //lea (%r8,%rdi,1),%rdx
0x48, 0x81, 0xfa, 0x00, 0xca, 0x9a, 0x3b, //cmp $0x3b9aca00,%rdx
0x7f, 0xe8, //jg <clock_gettime+0x48>
0x48, 0x85, 0xd2, //test %rdx,%rdx
0x79, 0x1e, //jns <clock_gettime+0x83>
0x4a, 0x8d, 0xbc, 0x07, 0x00, 0xca, 0x9a, //lea 0x3b9aca00(%rdi,%r8,1),%rdi
0x3b, //
0x0f, 0x1f, 0x00, //nopl (%rax)
0x48, 0x89, 0xfa, //mov %rdi,%rdx
0x48, 0x83, 0xe9, 0x01, //sub $0x1,%rcx
0x48, 0x81, 0xc7, 0x00, 0xca, 0x9a, 0x3b, //add $0x3b9aca00,%rdi
0x48, 0x85, 0xd2, //test %rdx,%rdx
0x78, 0xed, //js <clock_gettime+0x70>
0x48, 0x01, 0x0e, //add %rcx,(%rsi)
0x48, 0x89, 0x56, 0x08, //mov %rdx,0x8(%rsi)
0xc3, //retq
// constant
0x00, 0x00, 0x00, 0x00, 0x00, 0x00, 0x00, 0x00, //CLOCK_IDS_MASK
0x00, 0x00, 0x00, 0x00, 0x00, 0x00, 0x00, 0x00, //TV_SEC_DELTA
0x00, 0x00, 0x00, 0x00, 0x00, 0x00, 0x00, 0x00, //TV_NSEC_DELTA
}

fakeImage 最后三个参数是偏移量,以及传递的 CLOCK_IDS_MASK, 这些汇编是什么意思呢???

查看汇编操作码,0xe4 是系统调用 clock_gettime 的操作码,后续都是对结果进行注入,要么增要么减,制造偏移量 time skew

测试案例

1
2
# git clone https://github.com/chaos-mesh/chaos-mesh
# cd chaos-mesh; make watchmaker

首先下载 chaos-mesh, 然后编译 watchmaker, 这是一个方便注入的小工具。

1
2
3
4
5
6
7
8
9
10
11
12
13
14
package main

import (
"fmt"
"time"
)

func main() {
fmt.Println("start print time")
for {
fmt.Printf("now %v\n", time.Now())
time.Sleep(time.Second * 20)
}
}

上面是测试的代码,每隔 20 打印当前时间,编译执行,同时用 watchmaker 注入 time skew

1
# ./watchmaker -pid 1970 -sec_delta -300

隔一段时间间后,再次执行停止执行注入

1
# ./watchmaker -pid 1970 -sec_delta 0
1
2
3
4
5
6
7
8
9
10
11
12
13
14
15
# ./test
start print time
now 2021-05-26 03:31:46.701902309 +0000 UTC m=+0.000131483
now 2021-05-26 03:32:06.702230391 +0000 UTC m=+20.000459585
now 2021-05-26 03:32:26.702406569 +0000 UTC m=+40.000635793
now 2021-05-26 03:27:46.702688433 +0000 UTC m=+60.000918297
^@now 2021-05-26 03:28:06.702914898 +0000 UTC m=+80.001145022
now 2021-05-26 03:28:26.703120914 +0000 UTC m=+100.001350878
now 2021-05-26 03:28:46.703398463 +0000 UTC m=+120.001628357
^@now 2021-05-26 03:29:06.703707514 +0000 UTC m=+140.001937468
now 2021-05-26 03:29:26.704025346 +0000 UTC m=+160.002255480
now 2021-05-26 03:29:46.704302832 +0000 UTC m=+180.002532766
^@now 2021-05-26 03:35:06.704505387 +0000 UTC m=+200.002735491

now 2021-05-26 03:35:26.704931111 +0000 UTC m=+220.003161235

上面是代码执行的输出,可以看到 03:32:26 之后时间变成了 03:27:46, 停止注入后恢复

Limits

当前的实现,停止注入,并不会还原 vdso 代码,也就是说 fakeEntry 会一直存在,每次 clock_gettime 都会跳转,只不过偏移量为 0 而己

由于以上原因的存在,注入及注入之后的 clock_gettime 都是走的 syscall 系统调用,性能很慢,敏感业务需要重启,细节可以参考我之前的文章《时钟源为什么会影响性能》

当前注入,只能针对容器里的主进程,那些 fork 出来,派生出来的无做做到注入

小结

这次分享就这些,以后面还会分享更多的内容,如果感兴趣,可以关注并点击左下角的分享转发哦(: